<< First  < Prev   1   2   3   4   5   ...   Next >  Last >> 
  • 24 Oct 2016 5:20 PM | Deleted user

    Warning- this is the high end of things. Some want to do the absolute best possible, these tips and tricks will help you get there. They will NOT be critical in your U12's SG race (good skiing will win), as kids get older and better, these things can help.

    SWEATING THE DETAILS: Setup/Prep

    Ok, so I assume you've already read the CMAC tuning specs right?! You haven't? Well here they are:  Tuning Standards.pdf     So your skis are super flat, edges perfectly beveled, bases showing the effects of Love and Wax, sidewalls trimmed and smoothed right? GREAT!! That means your setup is already better then 95% of racers (99+% of skiers) out there. Good Job!!

    So what MORE can you do to get them even better? Well, that takes some special tools, skills, and thinking. What I'm talking about is Measuring and Assigning Roles, "What The Fogwax... is Gadget talking about now??!" Well, each pair (each ski actually) is a bit different right? SO, if you have a multiple-pair quiver (racer-trainers etc.) then you can take your ENTIRE QUIVER to a higher level by starting your setup work by measuring Each Ski and Assigning a Role to that ski.


    I measure: 1.) Mass in grams; 2.) camber in inches (to the .001); 3.) Flex in inches (to the .001); 4.) Thickness (.001 inch scale); and 5.) Sidecut.  No, I'm not going to tell you how I do it here- talk to me in person if you are dying to know. But- I WILL tell you that it makes a difference- a big difference to some skiers/racers.

    Yes, the winners of the CMAC Auction Tuning Package will get this level of setup. The Brand R skis currently in the shop will too (of course).


    Measuring is the FIRST thing I do, then I decide which ski will be a racer, a trainer, and which will be left and right.  As soon as I quit this exercise I will be back prepping again... it's just that time of year.

    From the long tape, you can tell I do a lot more than measure- and I keep track of it so that I can have a consistent (and consistently improving) system. This is from a pair of Ty's skis that I just finished.


    In case you were wondering, I rarely tune at this level with others around. Reason? Heads explode and the cleanup is so messy. 
    See you on the hill!

  • 21 Apr 2016 12:14 PM | Deleted user

    As Promised, here is an installment in my Spring and Summer Series

    Comparison of waxing methods

    (Overlays not considered)


    Methods:

    Hotbox

    Infrared

    Belt/Roller

    Ironing

    Ray’s Way

    Corking

    Application time

    3- 12 hours (*1)

    2-5 minutes

    2 minutes

    5-15 minutes (*2)

    5 minutes or less

    5 minutes or less

    Cure time

    .5- 8 hours (*3)

    .5-8 hours

    10-15 minutes

    .5- 8 hours

    0 minutes

    0 minutes

    Finishing time

    15-45 minutes

    15- 45 minutes

    0-2 minutes

    15- 45 minutes

    2-3 minutes

    2-3 minutes

    Equipment Cost

    $100-250

    $5,000 +

    $500

    $50-500

    $20-40

    $2-10

    Application Cost

    if done by shop

    $25-40

    $15-15

    $4-8

    $5-15

    N/A

    N/A

    Wax Use per ski

    10-15 g.

    .5-1 gram

    1 gram

    10-15 g

    .2-.4 gram

    .2- .5 gram

    Percent Wasted

    >90 %

    <10% (est.)

    <5% (est.)

    >90 % (*4)

    <5%

    <5%

    Amount absorbed

    .5-3 grams (*5)

    Unknown

    Unknown

    .5-1 gram

    >90%

    >90%

    Best Use

    Soft wax soak, new skis.

    Hard wax and difficult applications

    On hill ease

    Cleaning, new skis, HC waxes

    LF wax, HF wax, and overlays

    On hill quick wax

    Worst Use

    In a hurry

    Soaking

    Race Wax

    Fluros

    Soaking

    Soaking

    Durability  (*6)

    Best

    Best

    Good

    Best

    Excellent

    Good


    *1: Hotbox Application Time includes iron waxing time, and varies with purpose

    *2: Iron Application time varies depending on purpose and patience. Long ironing must be done carefully.

    *3: Cure time is defined as how soon the skis can be scraped, brushed and polished. Soft waxes cure slowly. The hardest waxes should be finished when slightly warm.

    *4: Waste wax can be successfully down-cycled as a fire accelerant for those with a fireplace.

    *5: Data from my long term study measuring ski weight backs up these estimates.

    *6: Durability is generally an over-rated characteristic for racers. The highest performing waxes are only expected to last 1 run or so. But for training, all day protection/glide is very important.


  • 19 Apr 2016 4:59 PM | Deleted user

    Hi Crew! I have a few things planned for the next couple of months: 1.)  A comparison of waxing methods, 2.) putting skis away (recycled content), 3.) Videos of "secrets," to ONLY be posted on Sprongo so that CMACers ONLY can see them. 4.) Brushing tricks, 5.) Juicing Tricks.  Should be fun!

    First the recycled content....

    Re-running a popular post from last year:

    You may well have a couple races left (as we do), but for sure you are starting to put some gear away. Some people try to sell some really NASTY gear- don't be that person! Here is a list to make sure your gear is ready for next year whether you keep it or sell it.

    Keeping OR selling it:
    Clean and dry
    Tune and wax
    Wax the edges
    Turn Down bindings
    Repair and/or scrap

    Clean and dry- you should really do this everyday, but it is hard sometimes I know.

    Dry gloves and clothes before packing to prevent mold and mildew.


    This is our drying rack. It is a little too full.


    Separate Liners from boots and allow to dry for several days or so... nice and slowly.


    Use Lysol to freshen up stinky liners. Your kids' roommate at camp will be glad you did!


    These are NOT skis you want to buy!


    Note the rust. NOT put away DRY.


    So- this ski should scare you. They are in my "waiting for time" pile of things to do. I will have to replace whole sections of base... bad news. (update: these skis were completely restored for a later blog post)

    HERE is what you want. These skis are trainers ready for the next training day (believe it or not): I consider this Race Ready condition for most races and racers.

    Wouldn't you rather find bases like this when looking for a ski to buy? Or a ski that you (or your kids) were about to use?

    Use Wax to preserve the edge. Wax DELAYS rust by keeping water and air away from the edge, but it will not prevent rust completely.


    Rub the wax onto the edge:


    Then buff the wax INTO the edge with a polishing cloth. Medium Hardness wax works best.


    Turn the DIN (spring tightness) down to about 10% above the lowest setting. This prevents the spring from weakening during the off-season.


    Once you have your skis clean, dry, tuned and waxed, mark what you did on Masking tape and put them away in your rack. Ready to go! 


    Sometimes it is a good idea to leave a thick coat of Storage wax on the skis. I do this if I am sure they won't be used for a month or more.Use your warmest, softest wax for that.


    I am available through the Summer if you need help prepping new skis, or if you want some tuning/waxing instruction. Use my email address on this article, if you do not have a different address for me already.


    I AM getting CMAC Tuning Training completed. It will be rolled out a little before the Fall meetings.

    See you on water, or maybe in the ballpark. Go Mariners!


  • 24 Mar 2016 9:02 AM | Deleted user

    This link will take you to a sizing document made 2 years ago, but still valid:  Ski Sizes by Age Class.pdf

    The only changes I would make to it are to say that for the U-16 skiers who have the biggest dreams,  they should move to the FIS ski (whenever possible) as a 2nd year u16. It is just easier.

    And for those FIS aged skiers (u19-u21) who do NOT plan on racing any FIS races at all (Northwest Cup would be their highest level), they DO NOT HAVE to have the newest FIS skis. Some of the Masters' skis are much less demanding and more fun. 

    Here is a link to the USSA requirements. A quick glance will let you know that CMAC has more stringent recommendations than the USSA requirements. This is because we want to maximize Skier Development.

    https://www.skiracereg.com/data/uploads/event_212_1.pdf

    Happy Ski Hunting! See you at the banquet.

  • 15 Feb 2016 8:14 AM | Deleted user
    Sure, there are lots of ways to get a ski to glide better including structure, waxes, overlays, etc- but often I find the most basic area is overlooked: Putting the skis away properly every day after use and transportation.

    I will cover these 3 subjects: 1.) Clean, Dry Skis; 2.) Ski straps; and  3.) Waxed Edges.

    Clean and Dry skis:

    Put the skis away Clean and Dry. This is often as simple as a napkin, paper towel, or even dirty t-shirt wiping dirt and water off of the edges before the skis go into the car after skiing, and again when they come out after the trip. This is even more critical if salt or other chemicals were used on the hill. Rust and dirt are super slow. You don’t want them on your race skis.

    Ski Straps

    I see a lot of unneeded wear on bases because no (or too few) ski straps were used.  A fast base structure is a lot of work (and/or money) to establish, you want to preserve and protect it. Ski straps are cheap and easy to find, so use 2-4 straps per pair of skis and protect those edges and bases!

    Wax Edges

    Does wax make edges faster? Well yes and no. Wax rubbed onto edges wears off on the snow within seconds so it doesn’t help much there. But wax rubbed onto a Clean, Dry ski retards the formation of rust considerably, and ANY rust is Super, super slow. So as soon as the skis are clean and dry, rub some wax onto them and rub it IN with a clean, dry cloth. 

    These 3 tricks will not cost you anything (you have ski straps and wax already, right?), and combined they will make for longer lasting, faster, and better turning skis. 

    See you on the hill!

  • 05 Jan 2016 4:42 PM | Deleted user

    We tell our racers to get themselves prepared off season to perform in season, but the same is true for techs/equipment geeks/Parents/ATMs.  I will talk about 1.) Getting Gear ordered, 2.) Getting gear (and tools) prepped, 3.) What gear you really want, 4.) Long Term planning. 5.) And the why...


    First the why (#5): We live busy lives. Most of us have NO time to do a good job in the heat of season. This is work that needs to be done slowly, purposefully, carefully. In my case, I tuned 3 pairs of skis today while I thought about/composed this article. I have 4 more pairs to work on before I get to bed. Then tomorrow (and the next night), I am back on the hill again. Time? It is really precious, I could not do planning, purchasing and prepping while also maintaining gear- and coaching, not to mention working, parenting, cooking, driving...


    outside of the hotbox- and inside:


    #1: Ordering Gear (and tools): Many people don't like to think about skiing until after Summer- labor day at the earliest. Up to age 12 or so, you can get away with that, but once kid grow into Big Kid gear, you should start shopping in May or June (for great used skis/boots/bindings), and try to place orders for new FIS gear by late June at the latest. Does this seem crazy to you? Well, I know plenty of people who are sure this IS crazy, But you will get better prices, more selection, and overall higher quality if you START EARLY. DO IT!!


    tool boxes #1 and 2 outside, and 1 drawer open:


    #2:Prepping gear and tools: Boots should be fitted, stanced, and aligned before Summer camp, if at all possible. Skis should be prepped for Summer Camp, and again after. TOOLS: Wax, files, stones, and larger tools (irons, hotboxes, etc). should be purchased, prepped, organized, and setup for the year. IF you have a large volume of work to do and little time to do it, consider buying or making a hot box, and buying rotobrushes. Start working with your tools in July, and by the time December rolls around, you will be ready!


    Bulk waxes under the hotbox- my double brush. For cleaning primarily in2 directions.


    #3 Gear you REALLY want: A "ski glide" tool (also known as a Ray's Way Wax Wizard) is a HUGE time and money saver. A digital iron is a requirement, a Hotbox, is super handy, and rotobrushes.  Those last 2 are not requirements- but they can save 10s of hours over the course of the season. A GREAT toolbox helps with organization, and base flattening tools can help keep your racers fast and learning faster!


    Skis after a night in the hotbox. Note the "dry" spots... This tape has my personal code to help me keep track of work done. The translation to my son is "Dad loves you and is helping you ski fast!"


    #4 Long Term Planning: Get to know the older racers and parents of racers. Much of their Prized Gear will soon be surplus and could be yours. Develop relationships with gear peddlers and techs. As soon as is practical,  pick a ski brand to work with. Ask for and listen to the advice of the reps from the ski companies you like best. These people are smart, and they are at least as passionate about the sport as you are.  


  • 10 Oct 2015 7:55 PM | Deleted user

    In the last year or so, the upgraded SkiRacing.com has added a great section: Backshop.   http://www.skiracing.com/premium/backshop-5-simple-steps-for-fast-skis/  This series has been consistently great and I can't recommend their tuning series highly enough. Jim Schaffner is a Master Tuner and a very good teacher.

    As a contrast, although there are TONS of tuning videos on youtube, but they are extremely inconsistent in the quality of information. In the case of You Tube, BUYER BEWARE!

    So if you are dying for more information to make your skis work well, Check out The Backshop.

    See you on the hill!

    -Gadget

  • 30 Sep 2015 7:20 PM | Deleted user
    High performance, high edge-angle skiing puts increased demands on tuners to properly prepare the side edges, side walls, and the top sheets. Why? Because the racers spend a lot of time with the skis laid over and NEED performance out of the side of the skis- not JUST the bases.

    This blog entry supports this document:

    Tuning Standards.pdf

    Sturtevant's and World Cup already have these specs and this info. I will also offer them to other shops who are willing to support us in this way.

    This is advanced tuning work.  I have taught the techniques individually and in clinics, and I will do so again this winter for those interested.  As tuner extraordinaire Blake Lewis says “Proper sidewall removal and shaping is an art unto itself.”

    In this post, I will discuss: 

     1.) Which racers/skiers need extreme sidewall tuning and which will benefit from a more moderate approach

    2.) How to tell if the skis you are working on need more attention to the side wall

    3.) How to setup side walls and top sheets on new skis

    4.) How to repair sidewalls on older skis.

    5.) Problems with over-tuning the sidewalls

    6.) Cap ski tuning

    7.) Suggested tools

    8.) I have included links to a few videos that I believe to a great job of explaining the process.

    9.) Longer Answers

    Short Answers, more details to follow:

    1.) Which skiers need Extreme Sidewall treatment?

     Only the U-16 and FIS racers who may be invited to a Western Region Camp or above need the most extreme sidewall treatment. Reasons for this logic will be explained in the LONG answer section.

    This is a FIS level sidewall. There is still SOME shoulder, but it is radically reduced, rounded and blended into the sidewall. You can see the radius by comparing to the shaping block

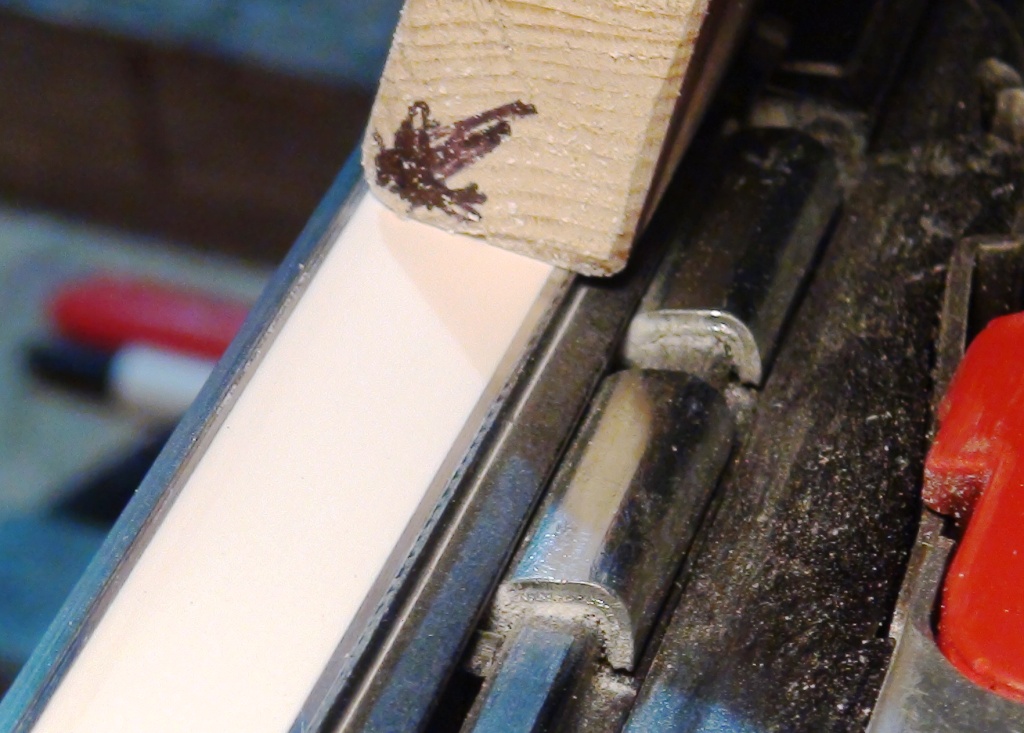
    1a.) Which racers would benefit from a more modest treatment?

    Racers up to the U-16/FIS level are better off with a more modest treatment. It will NOT slow them down, but it will preserve ski life and reduce ski setup/tuning time/cost.

    This is an example of a Junior level sidewall. The shoulder is relieved, and the sidewall is smooth. It is easy to file, but still very strong.

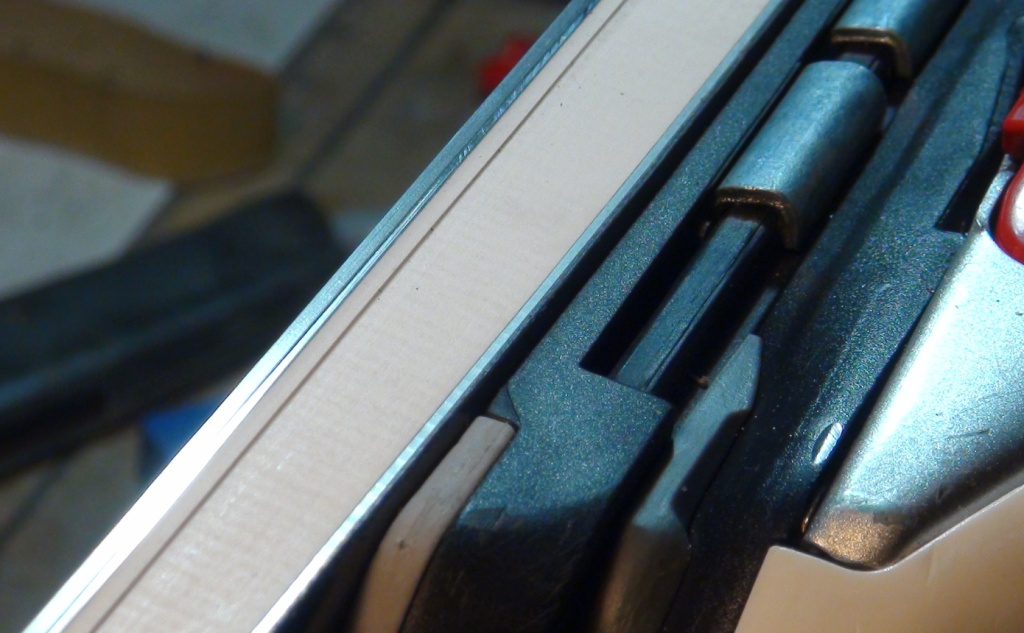
    2.) How do you tell if your skis need more sidewall attention?

    If you have to ask, they probably need attention, but the easiest way to tell is by coloring the edge with a black pen in a few spots, then run your file/edge guide over those spots ONE time.  Look where the pen markings are removed. If the ink is still on the shoulder above the edge, you may not NEED to remove more sidewall- but you may want to. See long answer for explanation.

    These pictures show a FIS level, brand new pair of skis. Notice the shoulder above the edge is pronounced, the sidewall is square and a bit rough, and there are still grinding marks on the skis. This is a typical new ski finish from the factory. Lots of remaining speed potential here!

    3.) How do you setup new skis?

    Top Edge: Start with a Panzer or other very coarse file that will remove a lot of material quickly, working on the Top Edge of the ski. Round the top edge substantially, then smooth, blend and de-burr your work with a finer file. Finally, sand the top corner smooth. Side Wall: Start with a sidewall planer, following be a backfiler (which is a high-degree file guide with a coarse file in it)  followed by sandpaper. For FIS level, further smooth with Scotbrite and finish with wax/polish.

    The big panzer file can do a lot of work, or a lot of damage REALLY quickly. Gloves must be worn, and it requires a couple of strong, confident hands. After the rough cut of the panzer, smooth and blend the top edge with a finer file and sandpaper.

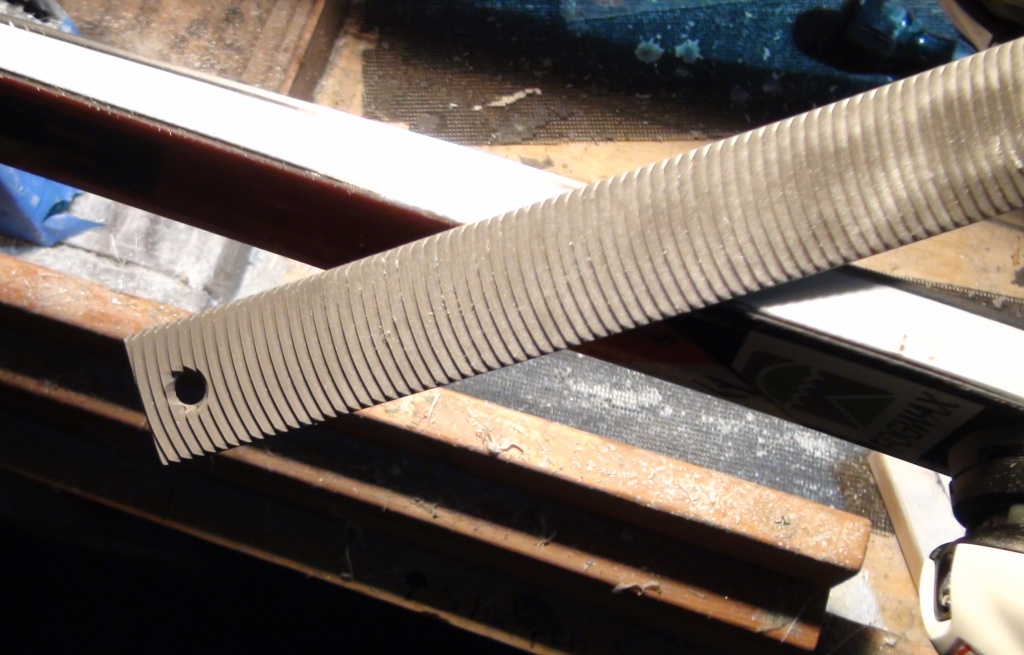
    Next step is the sidewall planer. For this picture, I have it set to remove maximum plastic sidewall and minimum bottom laminate of the ski. It is safer and easier to use if you set it to remove smaller amounts of material with each pass.


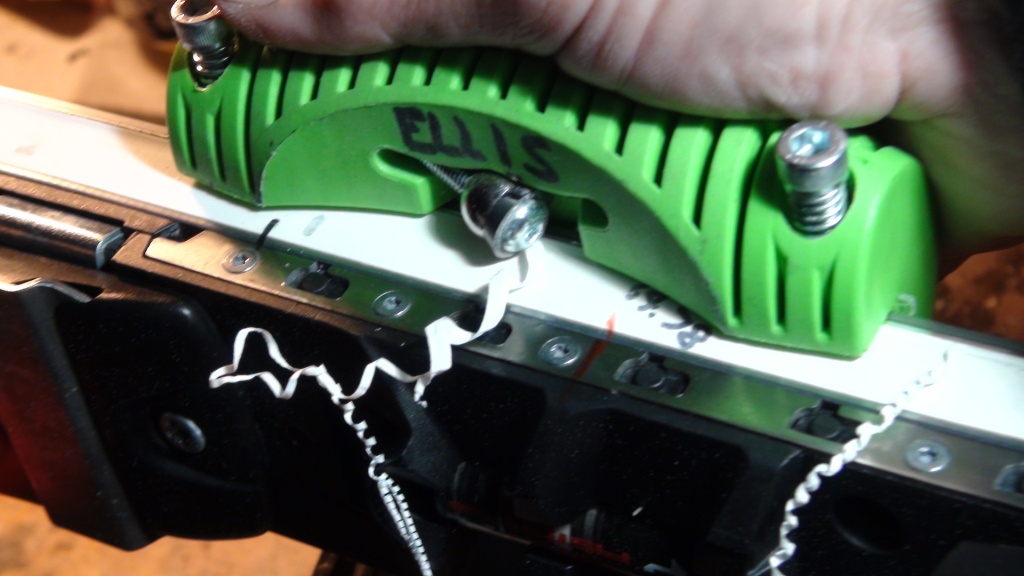
    This is a big of the sidewall dust you can expect while doing this work. Phenolic sidewalls create a fine, choking dust not unlike drywall. A vacuum should be used for cleanup, and a dust mask for personal protection.

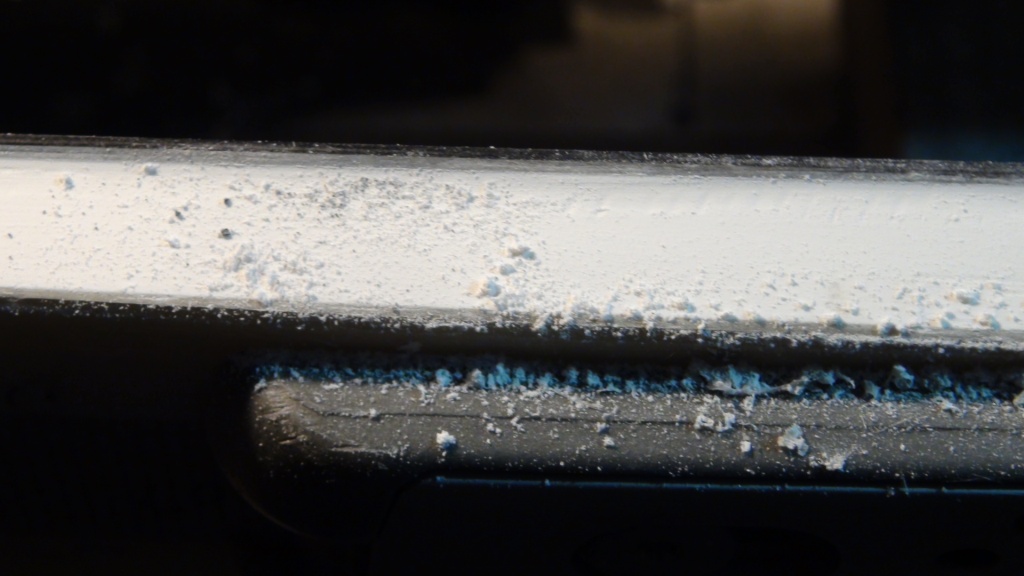
    This is a purpose- built shaping/sanding block made from a 1x2, 3 inches long. It has a radius of 1" on the corner that contacts the shoulder of the ski. Use it with 180-220 grit sandpaper to blend the sidewall.

    This was the goal: A radically reshaped sidewall and top edge (in this case) for a FIS GS ski. This will be an easy ski to sharpen and maintain.

    4.) How do you repair sidewalls on older skis?

    Top Edge: Smooth with fine file followed with sand paper. Sidewall: You may be able to use a sidewall planer to remove more material, but if the edge is already flat against the side, you will have to "trench" into the sidewall to gain access to the last bit of useable edge. Once this is done, you will need to remove more sidewall and top edge so that the ski will not hit the sidewall and skip off of the edge. This is time consuming and a little dangerous to fingertips because you must hand hold a small, sharp file flat against the sidewall and remove much of it. A sharp wood chisel can also be used (very carefully)- but the BIG requirement is patience. This is a tough job.

    This is a worn ski after sidewall removal and backfiling, but has not had much blending work done yet.

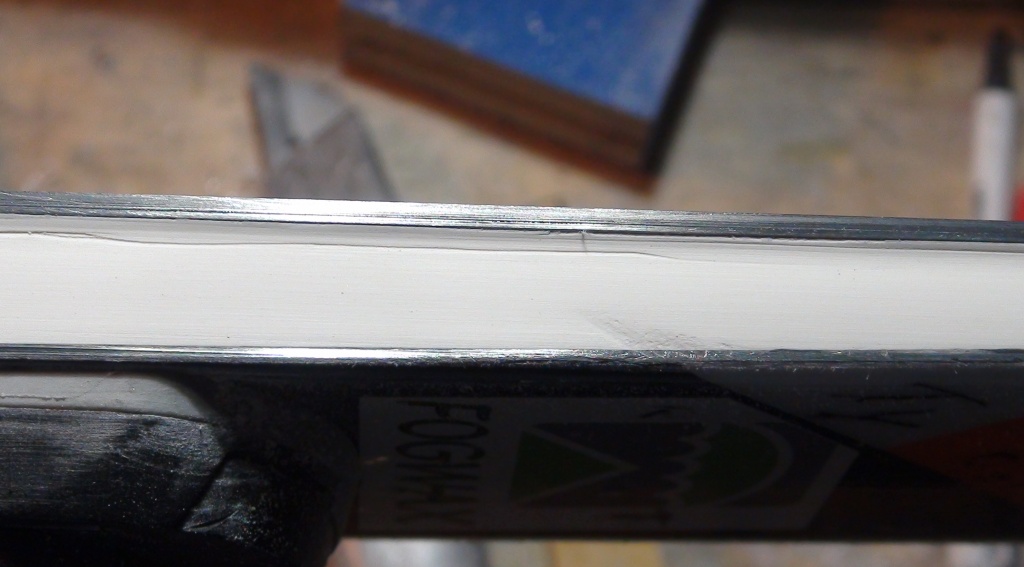
    5.) Problems with over-tuning:

    It is unusual for a ski with the entire shoulder removed to last an entire season.  For sponsored athletes (or those with large equipment budgets) this may not be a problem, but most racers need a pair of skis to last A FULL SEASON, if not longer. The shoulder above the edge is NOT a manufacturing mistake, it was designed into the ski to provide strength to the edge. Think carefully before cutting away more sidewall  than you really need, otherwise you may not have good skis left (unless you buy replacements) by the time the Spring races roll around. Over-beveled edges dull faster, can bend more easily, and even delaminations along the edge can happen to unsupported edges when the sidewall is removed. The most common problem is just running out of edge to work with.

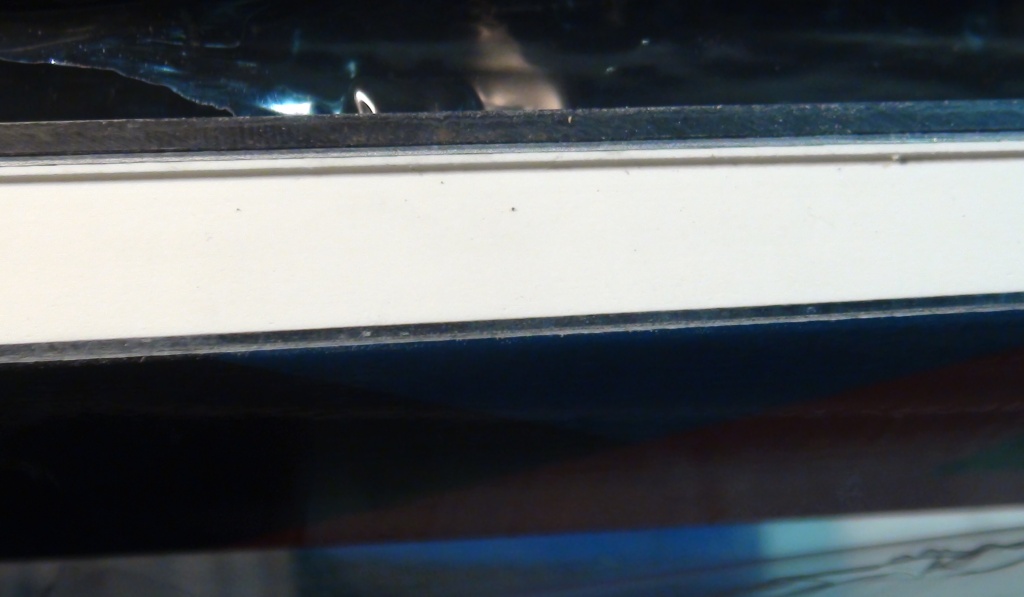
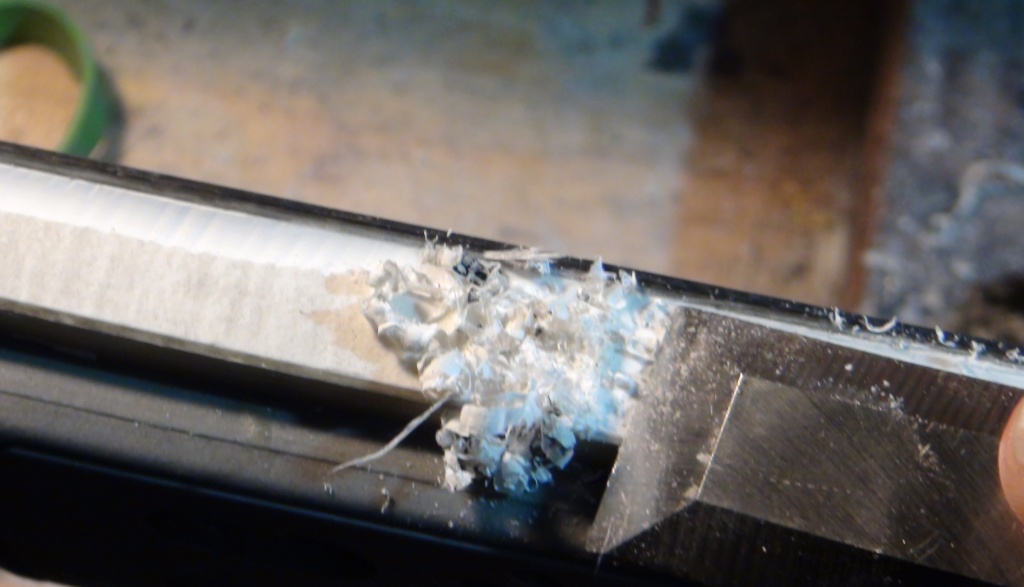
    This is an edge on a ski with about 1/2 season of use. The edge is already super thin. Top racing skis have very thin edges. They are built for performance, not durability. If you want your edges to last a full season, you must actively preserve them through tuning method and planning.

    This is a ski that has been filed so much that a trench had to be created to get access to the edge. To finish this ski properly, the rest of the sidewall (the flat, non-trenched area) must also be removed and the top of the ski must be reshaped.


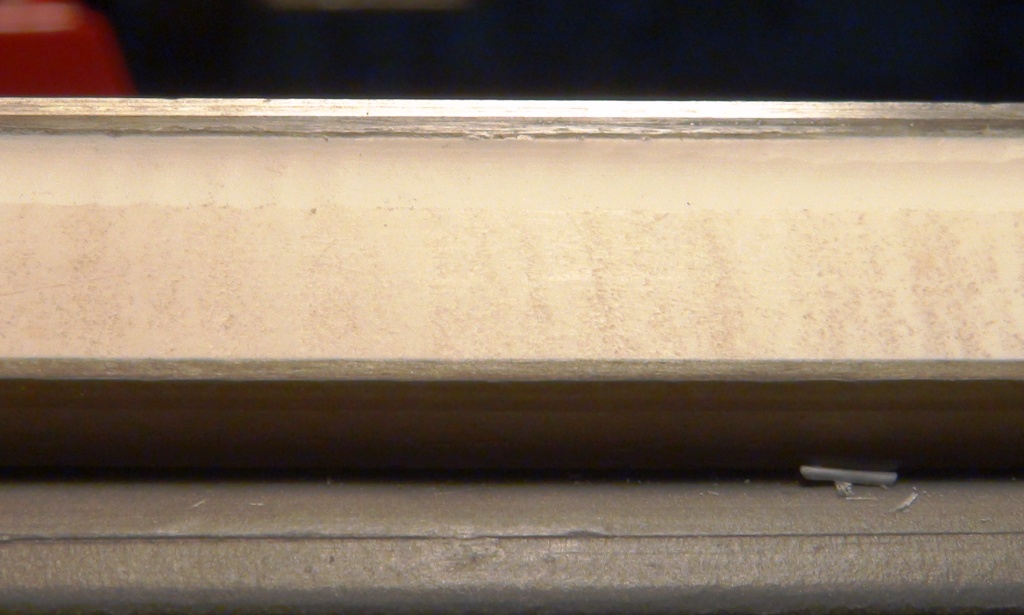
    This is the debris from ONLY 3 PAIRS of skis- sidewall removal is messy and time consuming.

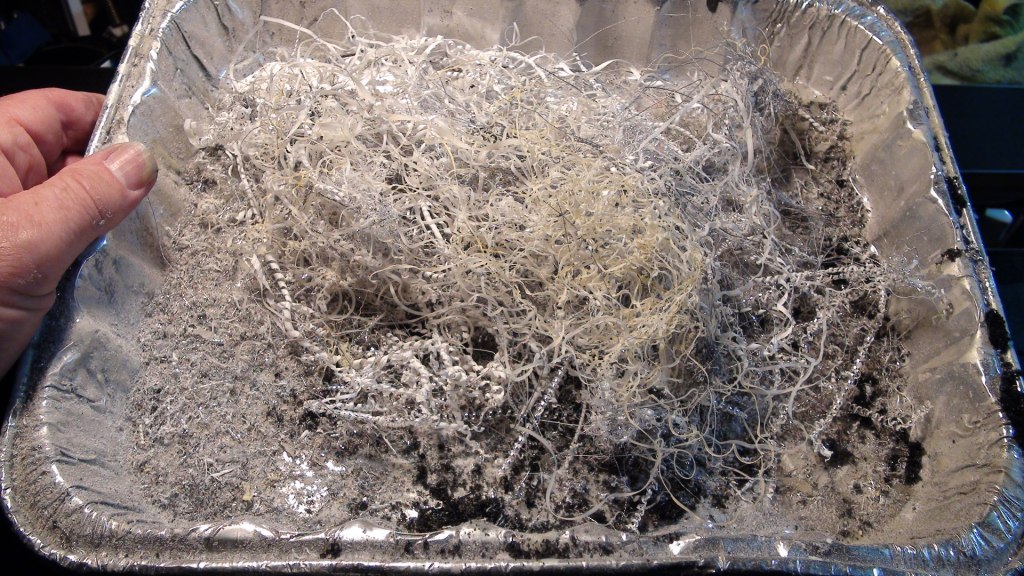
    If you haven't noticed how much work this is, then I haven't done a very good job with this post. Most people should hire this work out. You will be happier in the end.


    6.) CAP SKIS!!!

    It is easier to tune the sides of Cap Skis because the tops are already shaped for you. All you need to do is plane the shoulder off below the edge and blend it into the sidewall. Do NOT use a Panzer file on the sides of a cap ski. Sandpaper should be enough. So New ski are easier. But old skis (on the other hand), when you run out of edge on a cap ski, the ski is done- there is nowhere to go. The sidewall is thin and cannot be worked.

    Here is the sidewall removal on a cap ski. They are easier to shape than a laminate ski.

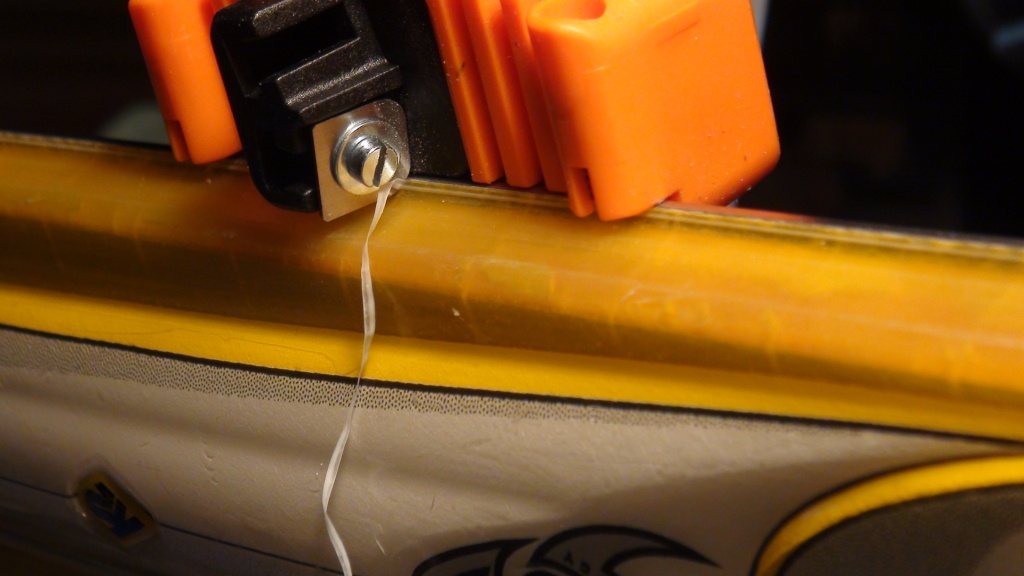
    7.) Suggested Tools:

    This list will be updated with a few more tools in the next couple of days...

    This is a classic sidewall tool. It has a rounded cutter which works the best on laminate skis.

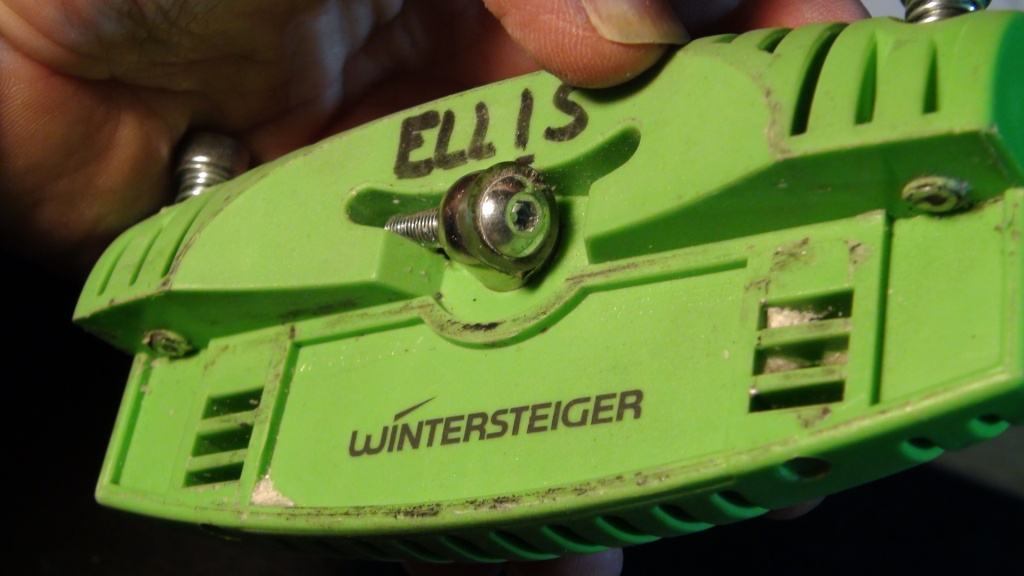
    This is a combination square and rounded-edge sidewall tool. The square edge works best with cap skis.
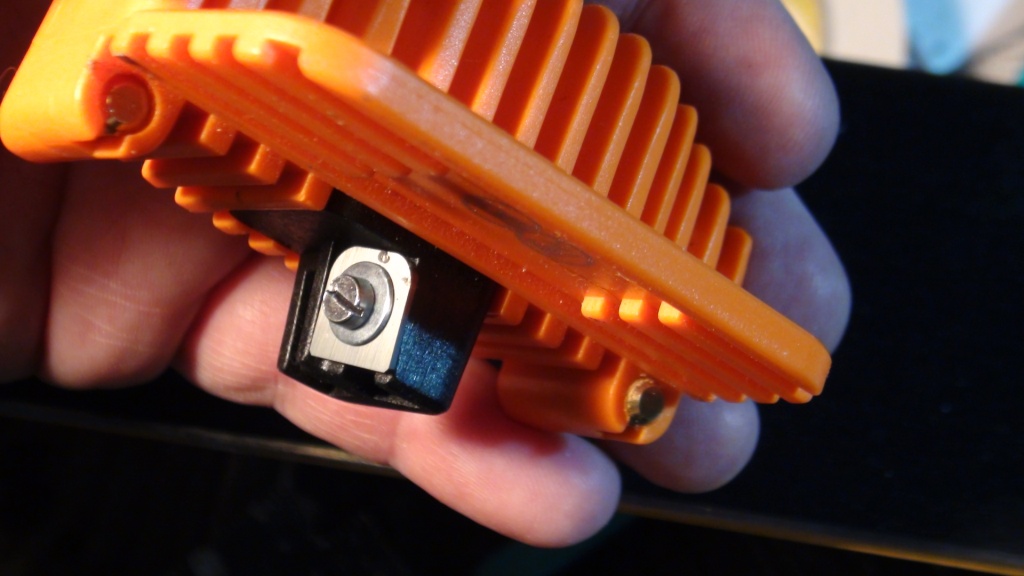
    8.) Videos:

     I shot some of my own videos this fall- but it is a TON of work, and not much fun for me, so I would rather point you to some good videos that already exist. Start Haus has made a Great Series of videos that I highly recommend. Here is one...

    Start Haus: https://www.youtube.com/watch?v=UPPP158_Wpg      This is a very good video and they have produced a complete series which is all very well done.


    Other Sidewall videos- useful, but NOT as good in my opinion.

    Toko video showing Basic removal: http://www.toko.ch/en/usage/application-videos/alpine-skis-and-snowboards/sidewall-tuning-videos/tuning-sidewall

    Aggressive removal from Swix: https://www.youtube.com/watch?v=AdPw8VmwDCQ

    Edge Beveling: https://www.youtube.com/watch?v=Pj6rM8riEoQ

     9.) Long Answers:

    Why are we pushing for a standard for FIS tuning? The answer lies in how the top racers in Western Region and above are skiing these days. They are laying the skis ALL the way over and contacting their boots, knees and hips so their skis MUST be tuned in such a way that they will hold even angled beyond 90 degrees.  The Western Region coaches understand this and are instructing their racers how to tune this way. We want all racers who may be skiing and coached at this level to have their equipment fully ready so that they can take full advantage of these great opportunities.

    Why don’t we tune ALL skis this way? As a consumer, it is up to you if you want to have all your families’ skis setup for the FIS standard. But you should understand that this is an expensive choice and may provide little or no benefit to you or your racers at a lower level. The ski companies and stores more than happy to sell you more gear, more often. Do want to buy gear twice as often? At the highest levels, Slalom Skis only last around 10 days on snow. If you have a full-ride sponsorship, it may be no problem- but for the rest of us, changing slalom skis 3-5 times/season is a substantial additional cost.

     Additionally, there is a not-unimportant safety issue to consider: Young (u16 and below) leg muscles, bones and joints are not nearly as strong as 18-25 year old racers’ legs and joints. Skis that hook up super hard can get them into trouble that they might not ski out of, and injuries can be the result.  I believe the BEST choice is to save the Most Aggressive Tunes for ONLY the Most Aggressive Racers that NEED them.

    Why do we have a Standard for Mighty Mites and Juniors? Because these racers also require their skis to perform properly in order for them to learn proper ski racing technique and tactics. Flat bases are especially critical to learn how to roll over a ski and carve a turn. These standards are intended to help parents provide what their kids need, and to help local shops provide the level of service that is appropriate to all our racers. Better for the kids, better for the shops (and home tuners), and better for the Parents- Win, Win, Win!

    I am moving on from this post now, but I am happy to answer any/all question. Please drop me a note.

    -Gadget

  • 12 Jul 2015 7:32 AM | Deleted user
    Welcome to CMAC!


    Stage 1 is designed to teach you how to maintain Skis in only 5 minutes a day. Included is a very basic tool list (at the bottom) as well as pictures and videos to show you every step of the process.So here we go!
    1. Dry the skis
    2. Put on brake retainers
    3. De-burr and touch up side and base edges
    4. Brush-Clean the bases and scrape
    5. Wax bases and edges
    6. Remove the retainer
    7. Strap up the skis
    And YOU ARE DONE!!


    Stage 1 Tools Required:

    Adjustable Side Edge guide    $50          http://www.tognar.com/pro-sharp-race-file-guide/  OR  http://www.tognar.com/fk-multi-edge-tuner/

    DMT Blue Diamond Stone       $20            http://www.tognar.com/dmt-4-inch-diamond-stones/

    Lubricant for the stone            $10            http://www.tognar.com/edge-polishing-solution-2-oz/

    All temperature Wax                 $30             http://www.tognar.com/swix-f4-universal-fluoro-wax-180g/

    Brake retainers (2-4)                 $5-10        http://www.tognar.com/fk-brake-retainer-w-hook-ea/

    Thick 6" Plastic scraper           $6              http://www.tognar.com/toko-ski-wax-scraper-6/

    Combo Brush                             $15             http://www.tognar.com/tognar-rectangular-brass-nylon-combo-brush/

    Wax Wizard                                $20              http://www.tognar.com/wax-whizard/

    If you have nothing at all, $150 will get you all you need for daily (Stage 1) maintenance.  Many things are available in stores locally, some are quite hard to find. Togar is located in Oregon and will get your order off to you FAST!

    pictures, videos and stage 2 tools list are next


    Tool lists, pictures, videos, and Stages 2-4 will be added soon. For those of you reading this work in progress, I expect to have it done by July 15.


  • 24 Jun 2015 6:03 AM | Deleted user

    CMAC racers and parents: This is little announcement. 

    I only get feedback occasionally, so have to do my best to set direction based on my vision of what I would like if I were a parent or racer at an earlier part of the learning curve.

    I always TRY to write in the Winter (when Ski Racing issues are front of mind), but time on the hill, shop, and behind the wheel limit my time with a camera and keyboard. SO I AM WRITING NEXT WINTER'S BLOG RIGHT NOW!! Please give any input/request ASAP so I can include them in the blog. Thank you in advance.

    Some projects I do seem to fall on deaf ears- such as arranging demos for kids at camp. This is a pretty rare and valuable opportunity- yet only a small percentage of CMAC Racers took advantage of it this year.  Personally, I LOVE trying out new gear, as does my son. Trying new stuff is how we learned what we like best and how to optimize what we have.

    Oh well, I will continue to pour out ideas. I guess we will just see what sticks.

<< First  < Prev   1   2   3   4   5   ...   Next >  Last >> 

All Tuning Blog Posts